מה זה?
אנימציה בסגנון Apple: אובייקט תלת מימדי שמתרכב מחלקים צפים כשהמשתמש גולל. אותו אפקט
שרואים בדפי מוצר של AirPods, MacBook ו-iPhone.
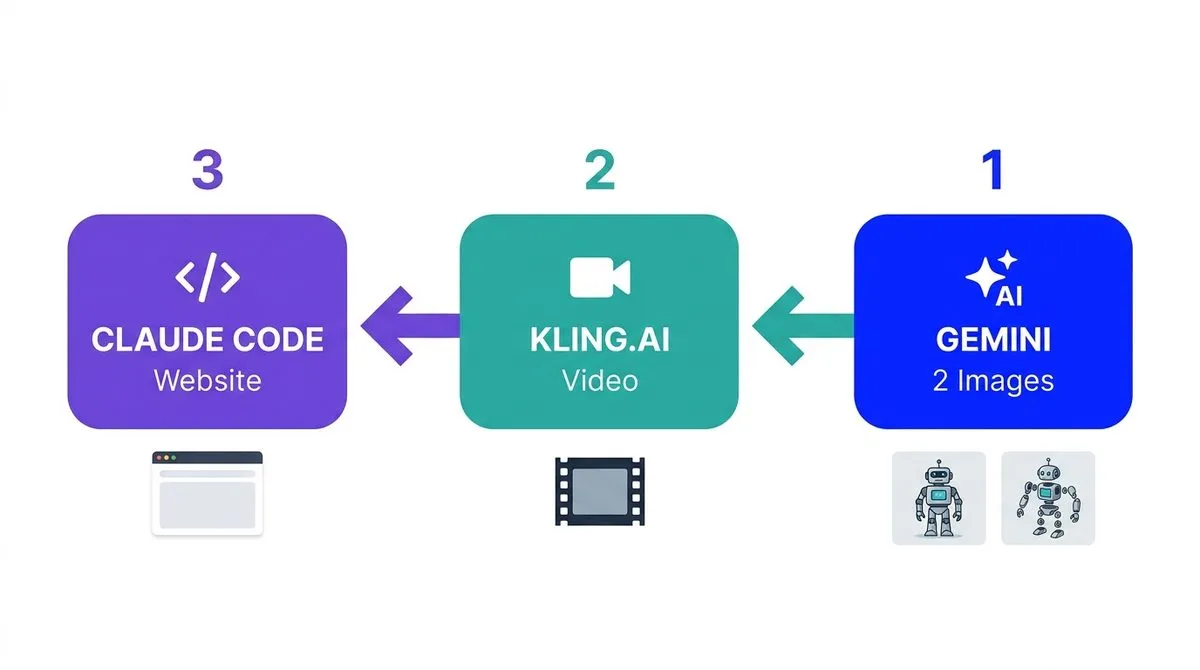
3 שלבים בלבד:
- Gemini: יוצרים 2 תמונות (שלם + מפוצץ)
- Kling.ai: יוצרים סרטון מהתמונות
- Claude Code: בונים אתר scroll-driven animation
שלב 1: יצירת תמונות ב-Gemini
הרעיון: לייצר 2 תמונות עקביות, אובייקט שלם (assembled) וגרסה מפוצצת (exploded view).
טיפ חשוב: סדר העבודה
- קודם יוצרים את האובייקט השלם, זה הבסיס
- אחר כך, מעלים את התמונה השלמה ל-Gemini ומבקשים גרסה מפוצצת
- העקביות בין התמונות קריטית: אותו אובייקט, אותם צבעים, אותו סגנון
Prompt לאובייקט השלם (דוגמה: רובוט)
This is an exploded view of a robot.
Generate the fully ASSEMBLED version of THIS
EXACT robot - all pieces pushed together into
one complete figure. Same head, same chrome
spine, same black armor plates, same cyan glow.
Standing upright, arms slightly away from body.
White background, same lighting. No text. 16:9.
Prompt לגרסה המפוצצת
Product photography style exploded view of a
high-end humanoid robot, COMPLETELY disassembled
into individual floating parts with large gaps.
Matte black carbon fiber with chrome accents
and neon cyan glowing edge lines.
NO connecting lines, NO blueprint lines.
Pure clean white background. 16:9 wide.
שלב 2: יצירת סרטון ב-Kling.ai
- נכנסים ל-Kling.ai ונכנסים ל-Video Generation
- מעלים תמונת התחלה (מפוצץ) ותמונת סוף (שלם)
- מוסיפים prompt שמתאר את תהליך ההרכבה
Prompt לסרטון
A humanoid AI robot being assembled from
floating parts, all components converging inward.
Head descending from top, chest closing in from
sides, battery core rising from below, arms and
legs snapping into place.
Thin blue connector lines shortening and fading
as pieces lock together. Motion blur on each part.
Clean white background, ultra detailed, 8K.
שלב 3: בניית האתר עם Claude Code
נותנים ל-Claude את הסרטון ואת ה-prompt הבא:
הנה הפרומפט המלא שחולץ מכל הצילומים לפי הסדר:
Scroll-Driven Frame Animation: Best Practices
A guide to building Apple-style scroll-driven product animations using an image sequence on canvas. This is the same core technique used on Apple’s AirPods, MacBook, and iPhone product pages.
The Pipeline
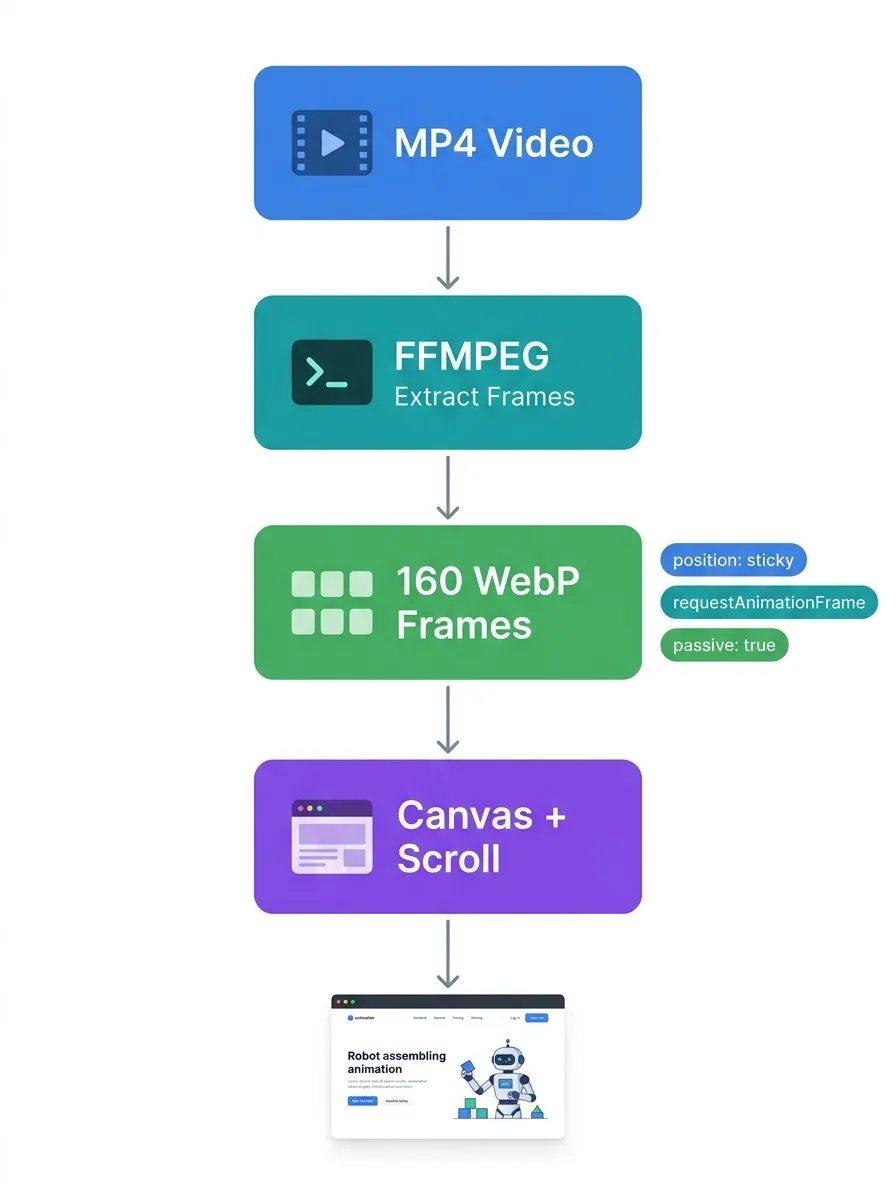
Video (MP4) → FFMPEG → Image Sequence (WebP) → Canvas + Scroll Logic
1. Use FFMPEG to Extract Frames from Video
Start with a rendered video (3D animation, screen recording, etc.) and extract it into individual frames:
ffmpeg -i animation.mp4 -vf "fps=30" frames/frame-%04d.webp- Choose your frame count based on how smooth you need it vs. total file size
- 120-200 frames is a good sweet spot for most scroll sections
- You can reduce further by lowering FPS or trimming the video first
2. Use WebP, Not JPG
WebP is the right format for this:
- 25-35% smaller than equivalent-quality JPEG at the same visual fidelity
- Supported in all modern browsers
- Optional alpha channel support if you need transparency
- Optional lossless mode for UI/text-heavy frames
In this project, 160 frames at 1928x1076 totaled only ~19MB (~119KB per frame). The same frames as JPG would be closer to 25-30MB.
3. Render on a Canvas, Not a Video Element
Do not use <video> for scroll-driven animations. Videos cannot be scrubbed frame-accurately, video.currentTime is unreliable, browsers decode asynchronously, and you’ll get flickering or blank frames.
Instead, use a <canvas> with pre-loaded Image objects:
const canvas = document.getElementById('frame-canvas');
const ctx = canvas.getContext('2d');

// Drawing a frame is essentially a GPU blit — nearly instant
ctx.drawImage(frames[currentFrame], 0, 0, width, height);
This gives you pixel-perfect, instant frame switching on every scroll position.
4. Preload All Frames Before the Experience Starts
Load every frame upfront behind a loading screen. If frames load mid-scroll, you’ll get blank flashes or jumps.
Batch the loading: don’t fire all requests at once:
const TOTAL = 160;
const BATCH = 20;

for (let i = 0; i < TOTAL; i += BATCH) {
  for (let j = i; j < Math.min(i + BATCH, TOTAL); j++) {
    batch.push(loadFrame(j));
  }
  await Promise.all(batch);
  updateLoadingProgress(i + BATCH, TOTAL);
}- Batches of 15-20 keep the pipeline saturated without overwhelming the browser
- Show a percentage/progress bar so users know something is happening
- Only remove the loading overlay once every frame is ready
5. Use position: sticky + a Tall Scroll Container
This is the structural trick that makes it all work:
.scroll-container {
  height: 400vh; /* the "scroll runway" — how far the user scrolls */
}

.sticky-wrapper {
  position: sticky;
  top: 0;
  height: 100vh; /* pins the canvas in the viewport */
  overflow: hidden;
}- The tall container (400vh) creates 3 viewport-heights of scroll distance to map across your frames
- The sticky wrapper pins the canvas in place while the user scrolls through
Scroll progress is simple math: progress = -rect.top / (rect.height - window.innerHeight)Adjust the container height to control pacing — taller = slower animation, shorter = faster
6. Separate Scroll Calculation from Rendering
This is critical for performance. Never draw to the canvas inside the scroll handler. Scroll events can fire hundreds of times per second on trackpads.
Instead, use two separate systems:
let currentFrame = 0;
let drawnFrame = -1;

// Scroll handler: ONLY calculates which frame to show
window.addEventListener('scroll', () => {
  const progress = getScrollProgress();
  currentFrame = Math.min(Math.floor(progress * TOTAL), TOTAL - 1);
}, { passive: true });

// rAF loop: ONLY draws when the frame actually changed
function tick() {
  if (currentFrame !== drawnFrame) {
    ctx.drawImage(frames[currentFrame], 0, 0, FW, FH);
    drawnFrame = currentFrame;
  }
  requestAnimationFrame(tick);
}
tick();
Key details:
The scroll listener is{ passive: true }so it never blocks scrolling or causes jankThe drawnFrame !== currentFrame check means younever redraw the same frame twice- requestAnimationFrame naturally throttles drawing to the display refresh rate
7. Tie Content Overlays to Scroll Position, Not Timers
If you have info cards, labels, or callouts that appear during the animation, map them to scroll ranges:
const phases = [
  { el: document.getElementById('phase-1'), start: 0.08, end: 0.24 },
  { el: document.getElementById('phase-2'), start: 0.28, end: 0.46 },
  { el: document.getElementById('phase-3'), start: 0.50, end: 0.68 },
  { el: document.getElementById('phase-4'), start: 0.72, end: 0.92 },
];

// Inside scroll handler:
for (const phase of phases) {
  if (progress >= phase.start && progress <= phase.end) {
    phase.el.classList.add('visible');
  } else {
    phase.el.classList.remove('visible');
  }
}- The user controls the pacing, content always feels responsive regardless of scroll speed
- Use CSS transitions for fade-in/out so it stays smooth
- Leave small gaps between phase ranges (e.g., 0.24 → 0.28) so cards don’t overlap
8. Polish Details
A few finishing touches that elevate the experience:
Radial gradient mask: soft-edge the canvas so frames float into the background instead of having a hard rectangle:
#frame-canvas {
  mask-image: radial-gradient(ellipse 65% 60% at 52% 50%, black 40%, transparent 75%);
}
Subtle rotation on scroll: adds a sense of 3D even with a 2D image sequence:
const rotation = -4 + progress * 12; // sweeps -4deg to +8deg
canvas.style.transform = `translate(-50%, -50%) rotate(${rotation}deg)`;
Scroll progress bar: a thin accent-colored bar at the top of the viewport shows overall page progress.
Glassmorphic overlay cards: backdrop-filter: blur() on the content cards so the animation shows through, reinforcing the layered feel.
Quick Reference
| Decision | Do This | Not This |
|---|---|---|
| Image format | WebP | JPG/PNG |
| Playback element | <canvas> | <video> |
| Frame loading | Batched preload, all upfront | Lazy load on scroll |
| Rendering | Separate requestAnimationFrame loop | Draw in scroll event |
| Layout | position: sticky + tall container | JavaScript-driven positioning |
| Content timing | Scroll-position ranges | setTimeout / CSS animations |
| Frame count | 120-200 frames | 500+ (too heavy) or 30 (too choppy) |
קרדיטים
כלים: Gemini | Kling.ai | Claude Code
רישיון: MIT
